In the previous tutorial, we’ve configured the Proxmox VM, and installed Windows. In this second part, we’re going to finalize a few options that will allow us to remote into this VM.
Introduction to Networking & Industrial Automation
Why do we care about being able to remote into this VM? Well, there are a few reasons as to why we need to go through the configurations outlined in this tutorial. On one side, my goal is to be able to create a private network that isn’t accessible through my ISP router. On the other side, I’d like to be able to remote into the VM and other VMs running on the same server based on policies. In addition to remoting into these VMs, I’d like for them to be able to pass messages outside of the network - Ex: AWS, Azure, GCP, etc.
Let’s tackle this one step at a time.
Installing Drivers in Proxmox
Remember that we’ve mounted a disk that contains various Windows drivers in the last tutorial. In Windows, this disk shows up as a regular DVD drive. We can use the files on this disk to install the remainder of the drivers.
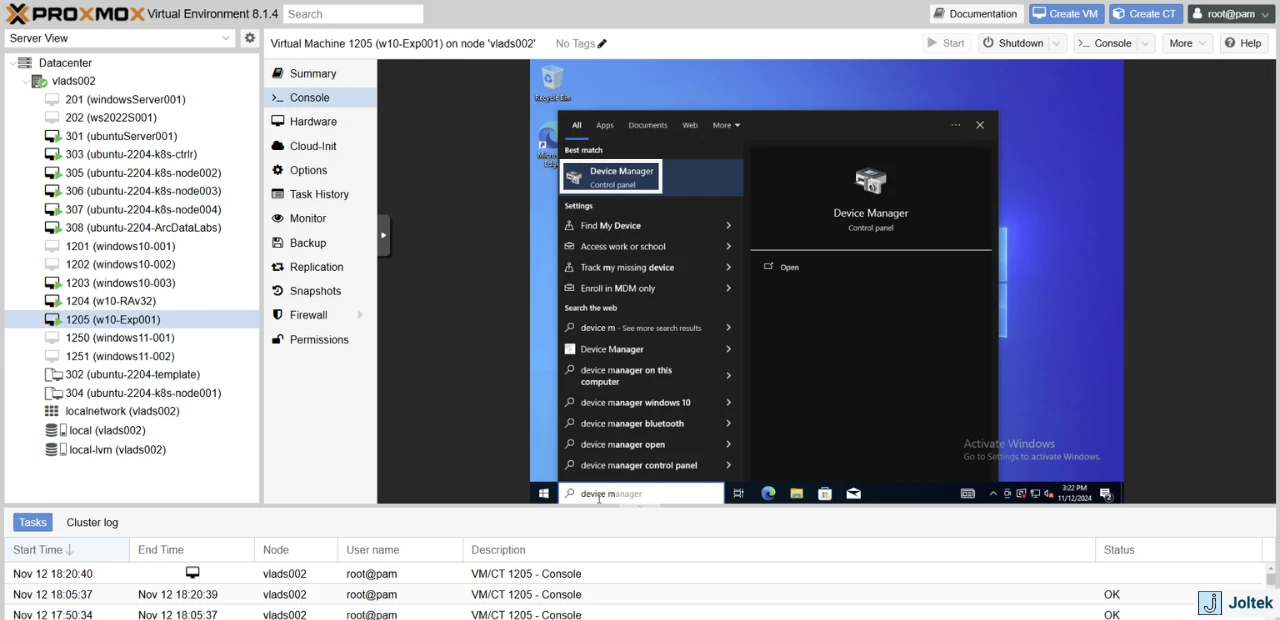
Search for the Device Manager and launch the application from the start menu.
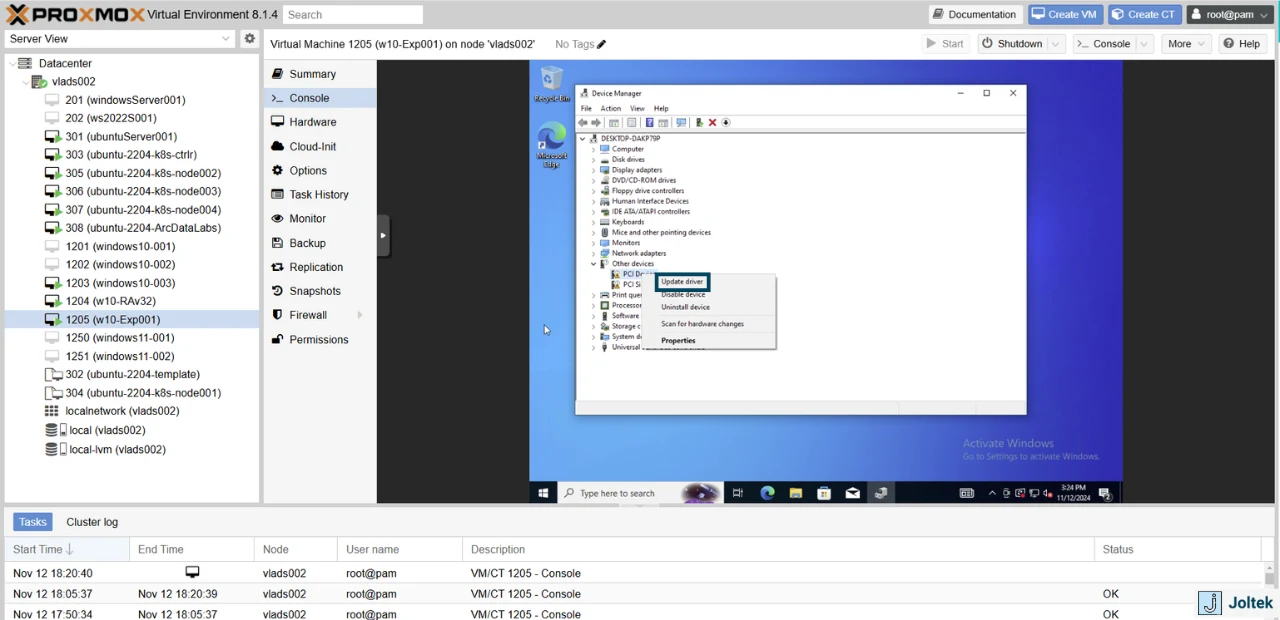
Here, you’ll notice that multiple drivers aren’t properly installed. Right Click PCI Device and select “update driver.”
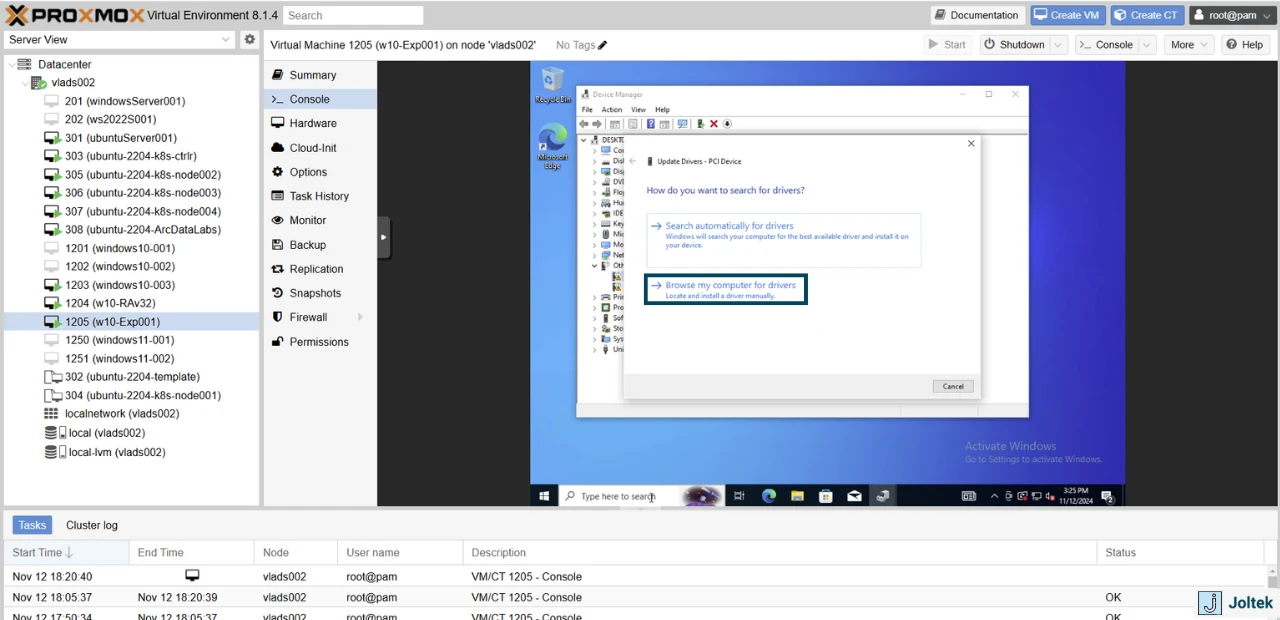
Select “Browse my computer for drivers.”
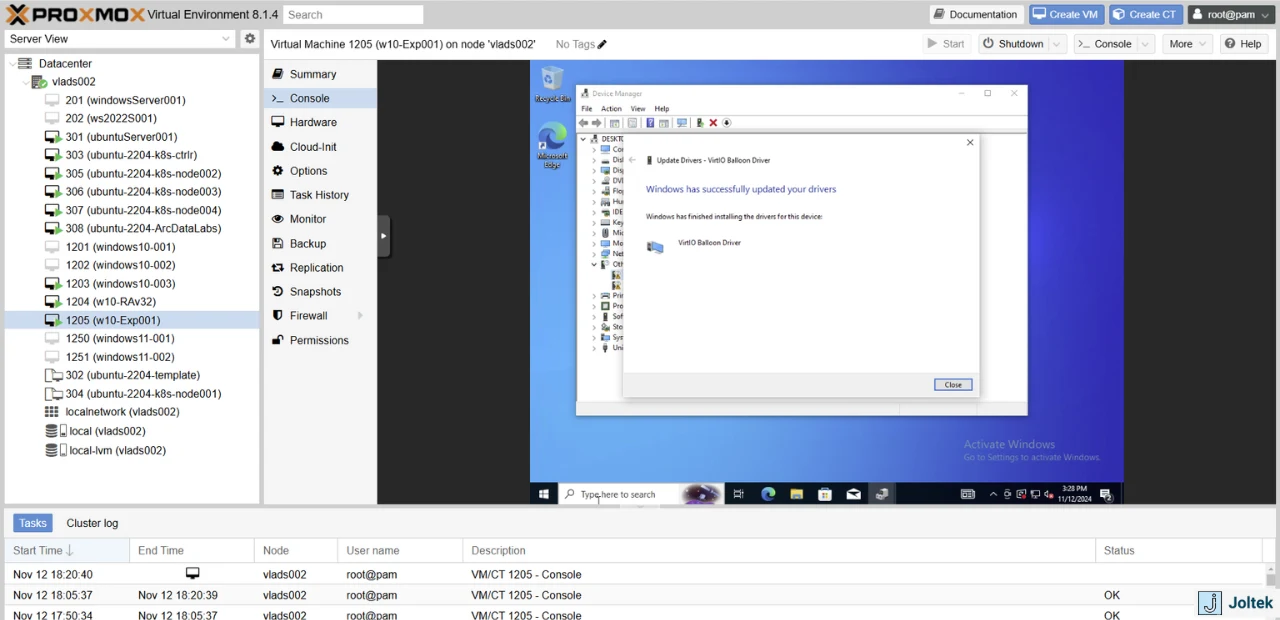
You’ll need to browse to the location of the drivers for your OS - Go to the drive with the drivers, Balloon, w10 (or w/e OS you’re using), amd64.

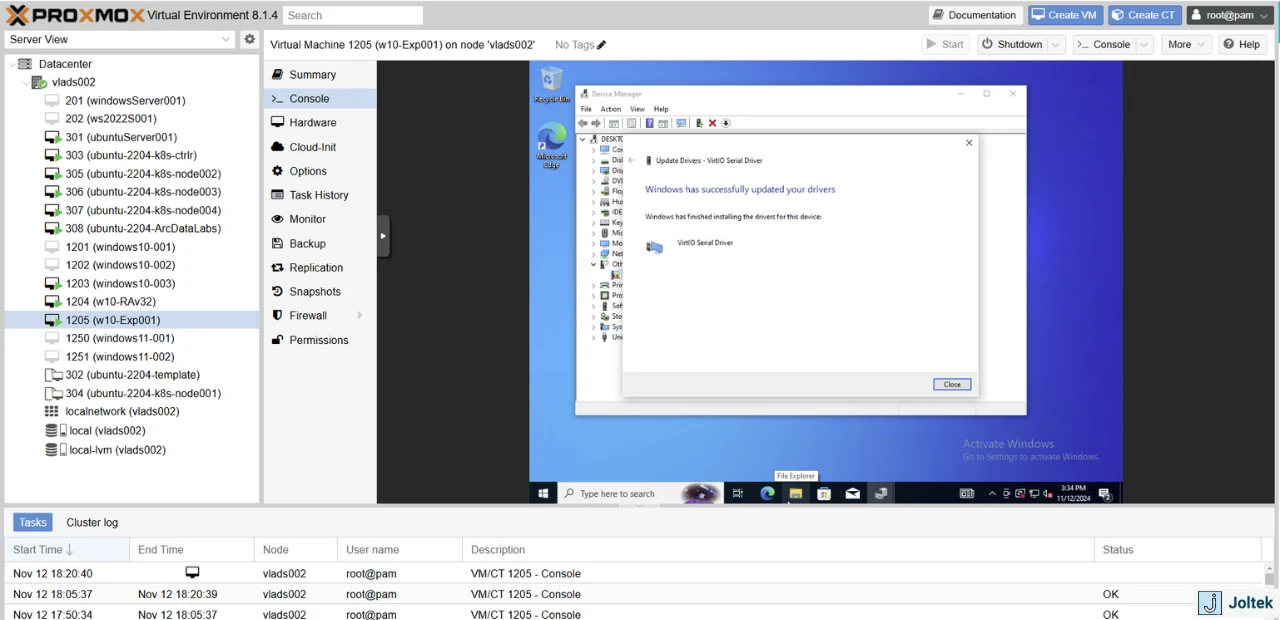
You should get a confirmation that the driver has been installed successfully.
We now need to repeat the same steps with the other driver that’s missing. Right click and select “Update driver.”
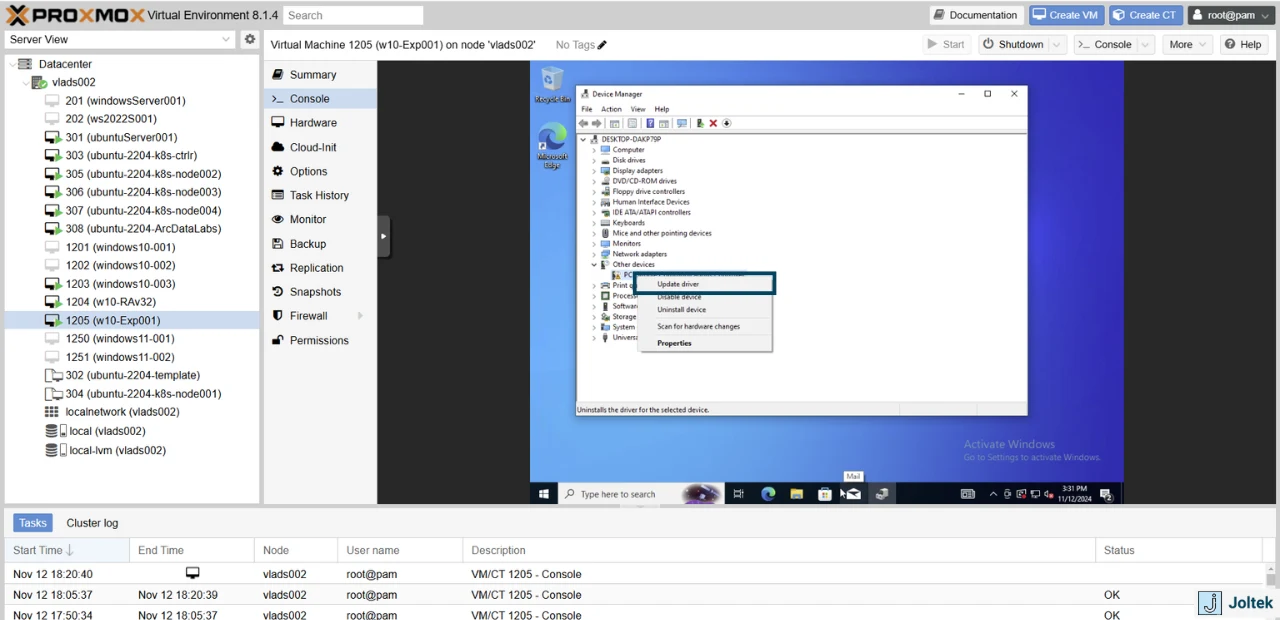
This time, since we’ve gotten the HDD drivers in place, we can simply browse the entire disk as shown below.
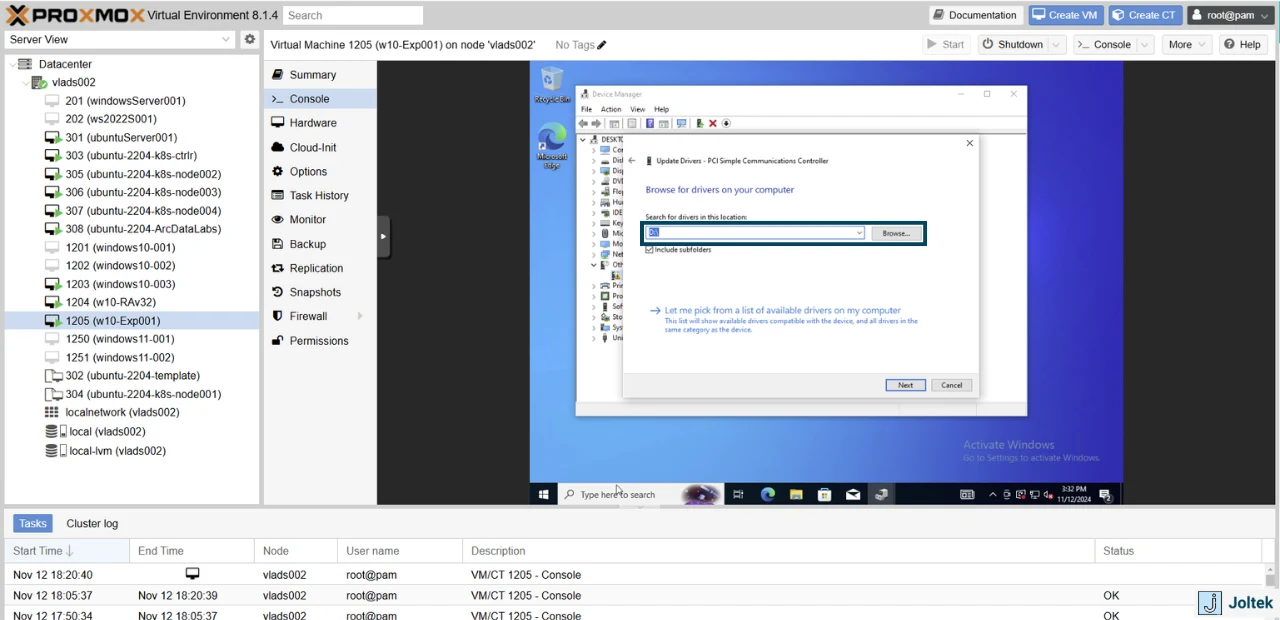
Once again, you’ll get the confirmation that the next driver has been installed.
Installing QEMU Agent in Proxmox
The QEMU Agent is what allows Proxmox VMs to network with the rest of the world. The installation is simple; open the DVD ISO from the file manager, locate the installer, and double click the file.
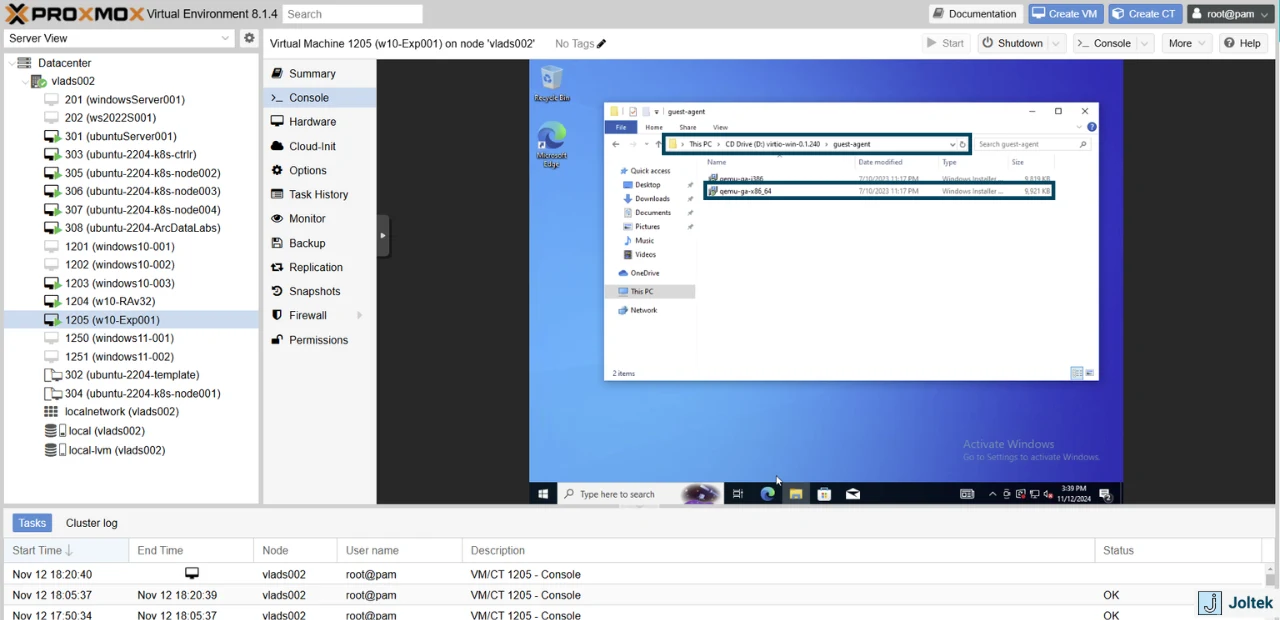
Notice that at this point, you can see the IP address of the VM under the “Summary” Tab.
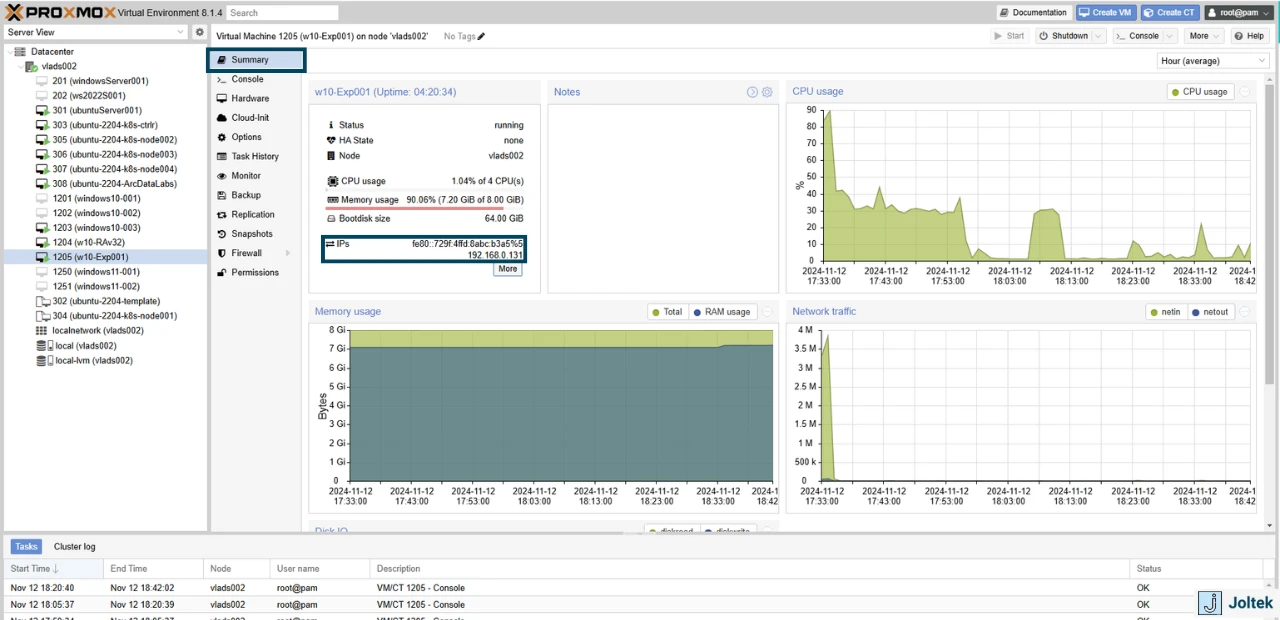
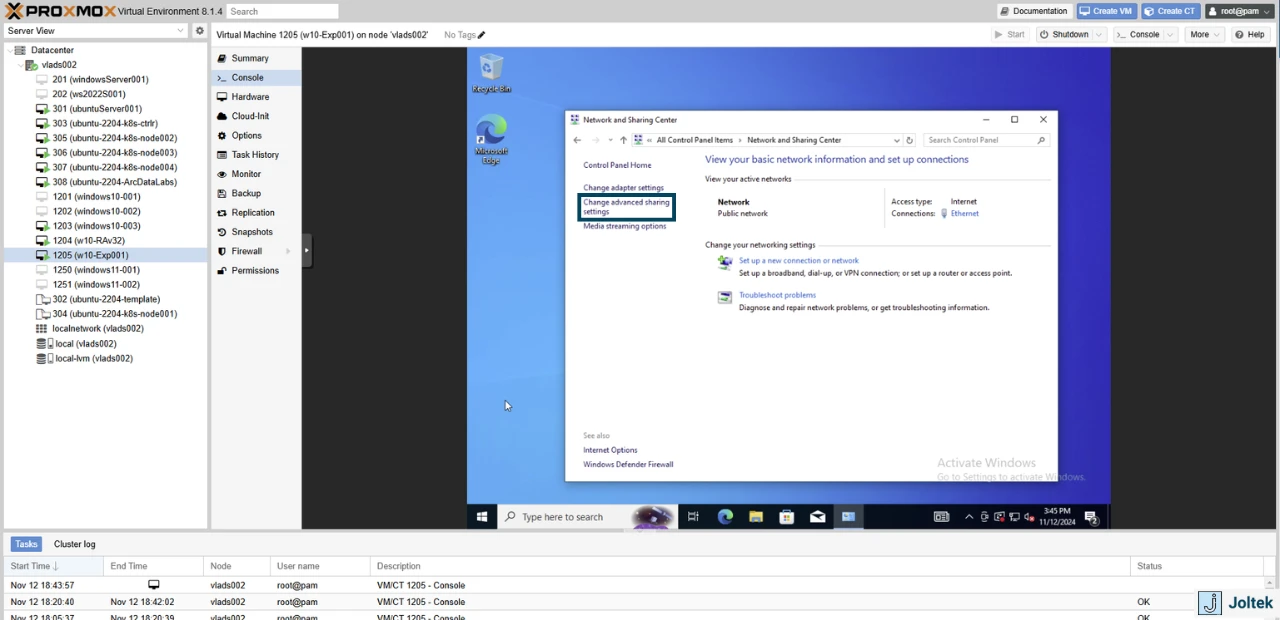
However, I wasn’t able to ping the machine as Windows needs to make it “visible.” Go to Control Panel > Network and Sharing Center. Click on “Change advanced sharing settings.”
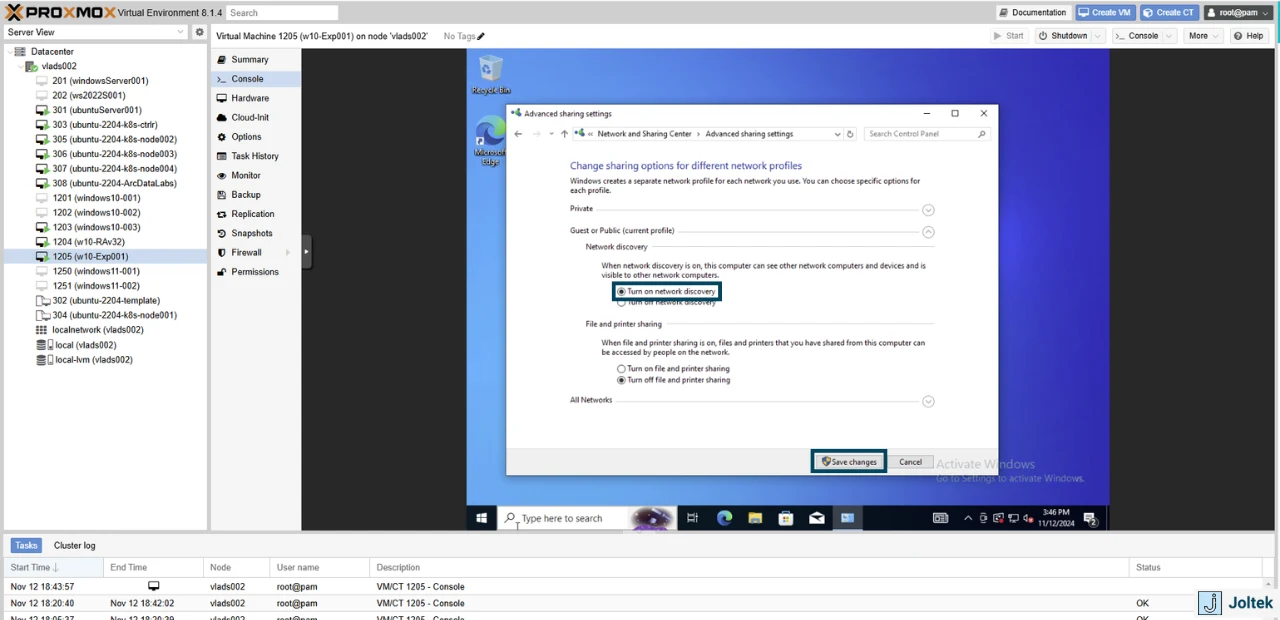
Make sure that “Turn on network discovery” is selected and press on “Save changes.”
Network Segmentation & Layout in Manufacturing
My goal with this Proxmox server is to create an environment similar to the one you’d find in manufacturing. It’s not quite there, but it’s definitely close. By using the Dell PowerEdge R730xd, I’m able to create two network interfaces - one is for my private network and the other for the public network.
Although the VMs can have both IP addresses, I can easily shut down the network cards in Proxmox settings or directly through Windows. This allows me to control which VM is going to be accessible from outside and which one is going to be strictly limited to the private network which doesn’t have access to the internet. Keep in mind that some of the initial setup steps do require me to put the VMs on the network - it’s easier to download certain software, patches, etc. It’s possible to have complete segmentation, but since it’s my home network, I don’t believe that is necessary. In a production environment, you’d probably want to take more precautions when setting this up.
The Network Layout
Based on the above, my current network is split into two subnets. My ISP router is the one handling day-to-day devices - laptops, cellphones, TV, etc. This network is entirely managed by a switch I’ve purchased and set up for DHCP for a certain range, and fixed for another. My private network, which consists of various devices, contains mostly equipment that doesn’t need access to the internet. These are PLCs, HMIs, VFDs, etc. This network is static - every device is assigned an IP address.

The Proxmox server is physically connected to both networks - it has multiple cards, which makes it easy for me to assign virtual adapters to the VMs and IP addresses as I’d like.
Note that based on the configurations we’ve previously made, it’s possible for me to ping the VM on the server from the open network as shown below.
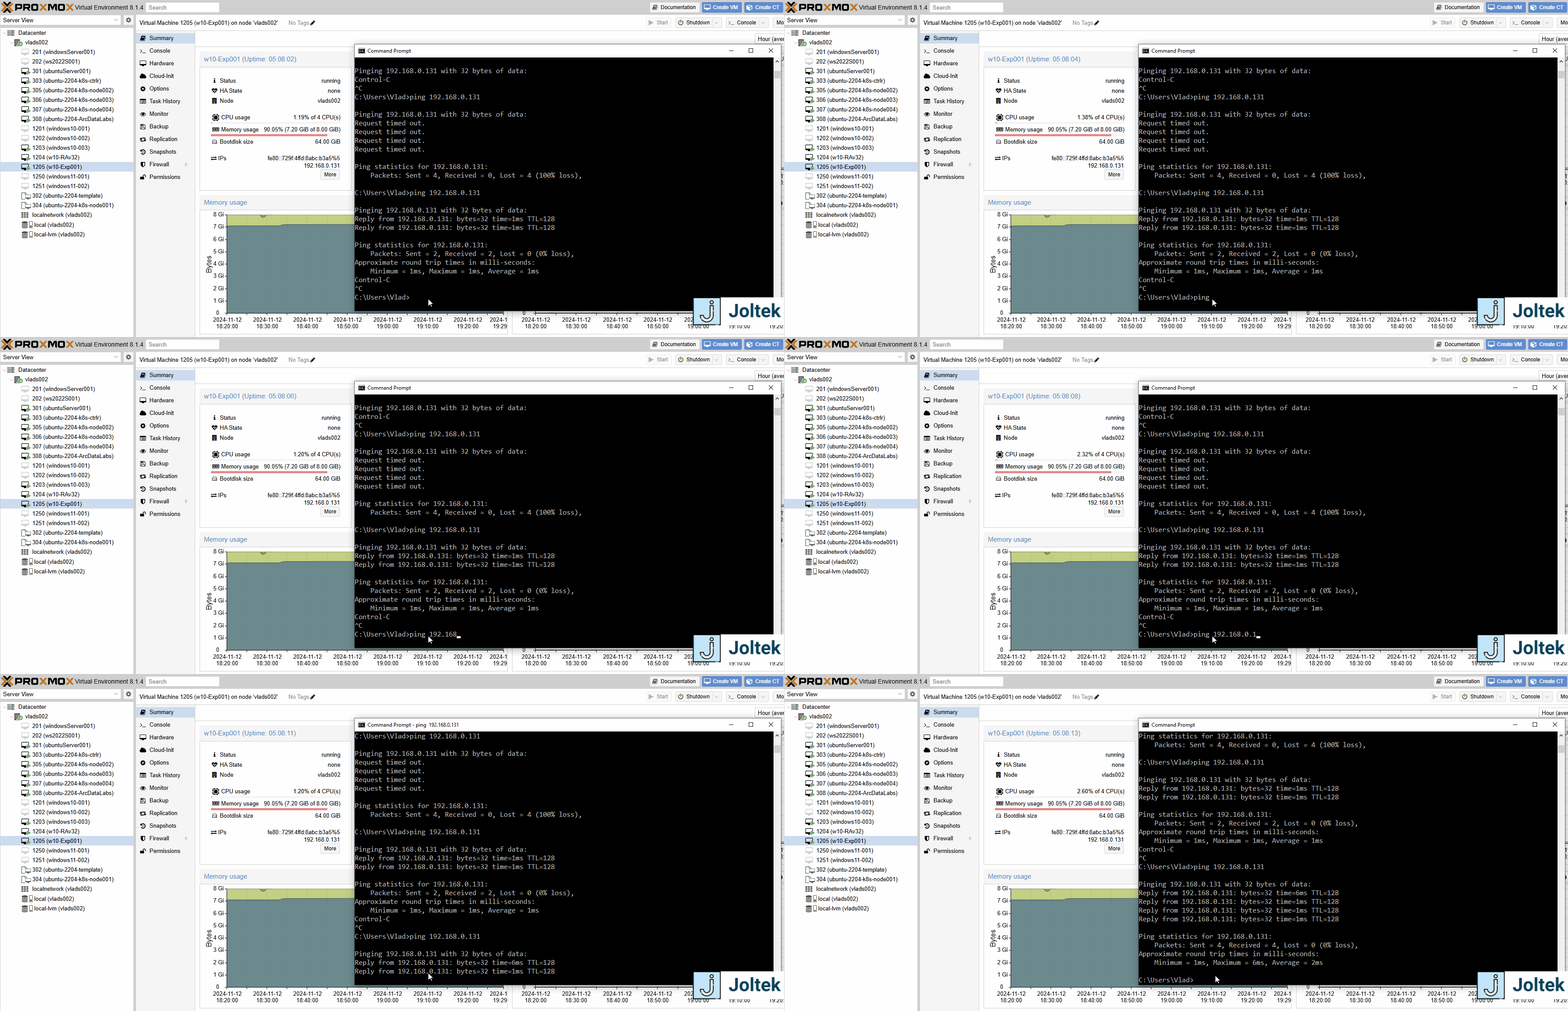
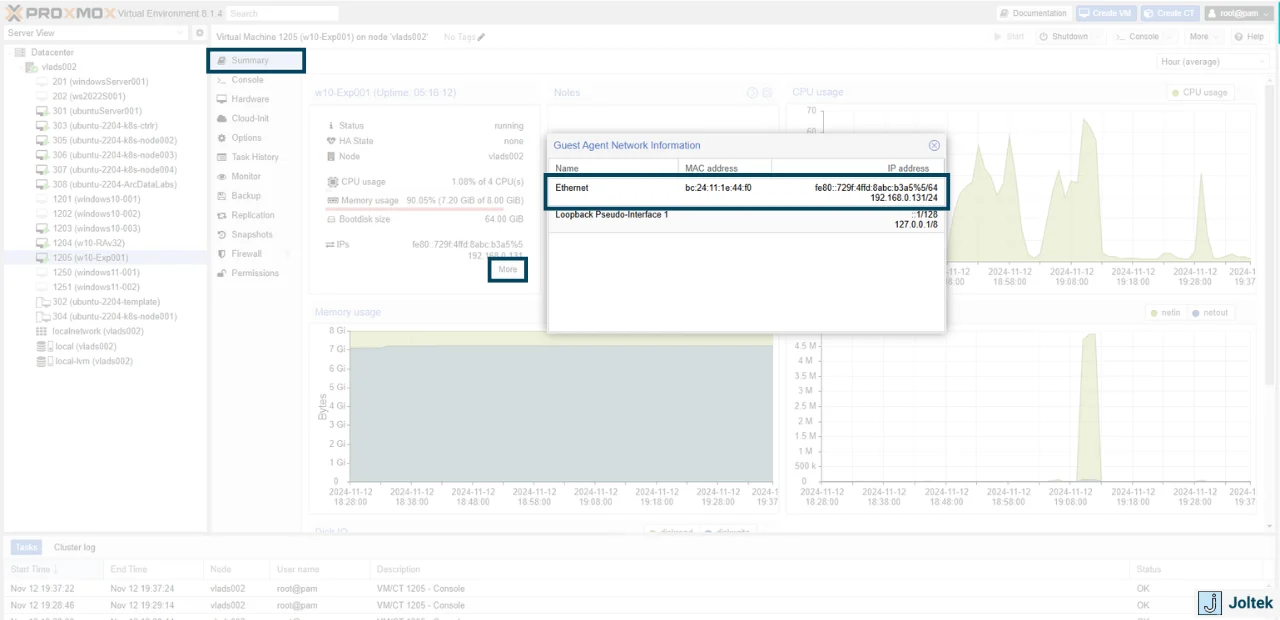
You’ll also notice that if we navigate to the Summary page and click on “More” under the ethernet settings, we’ll see that there’s that one IP assigned to the VM.
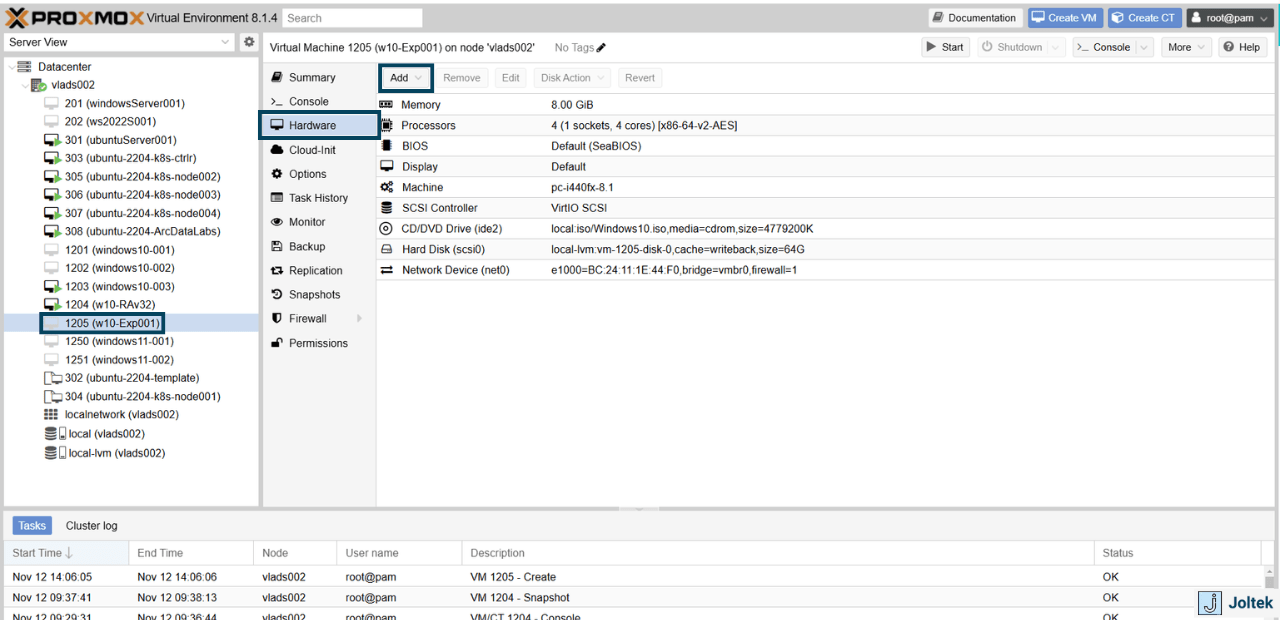
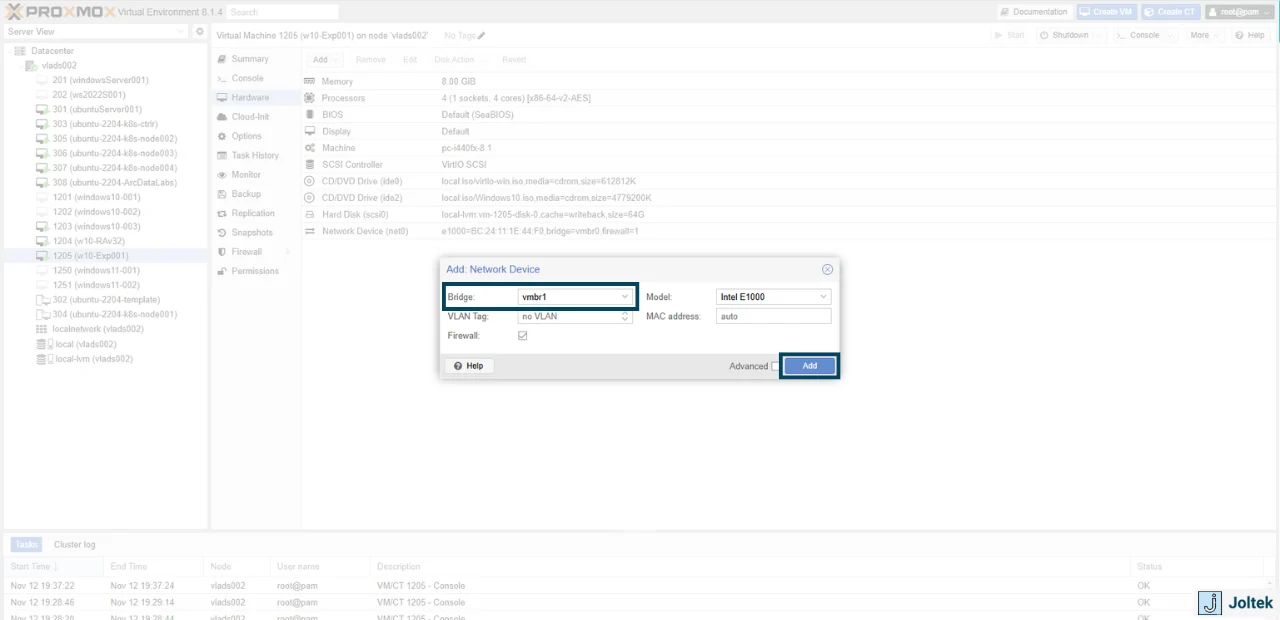
We’ll need to follow the same steps as we previously did with the CD / DVD drive addition. Go to the hardware tab and press on “Add.” Select Network Adapter and choose the network bridge you’d like to use. In my case, it’s going to be vmbr1 - “virtual machine bridge 1”
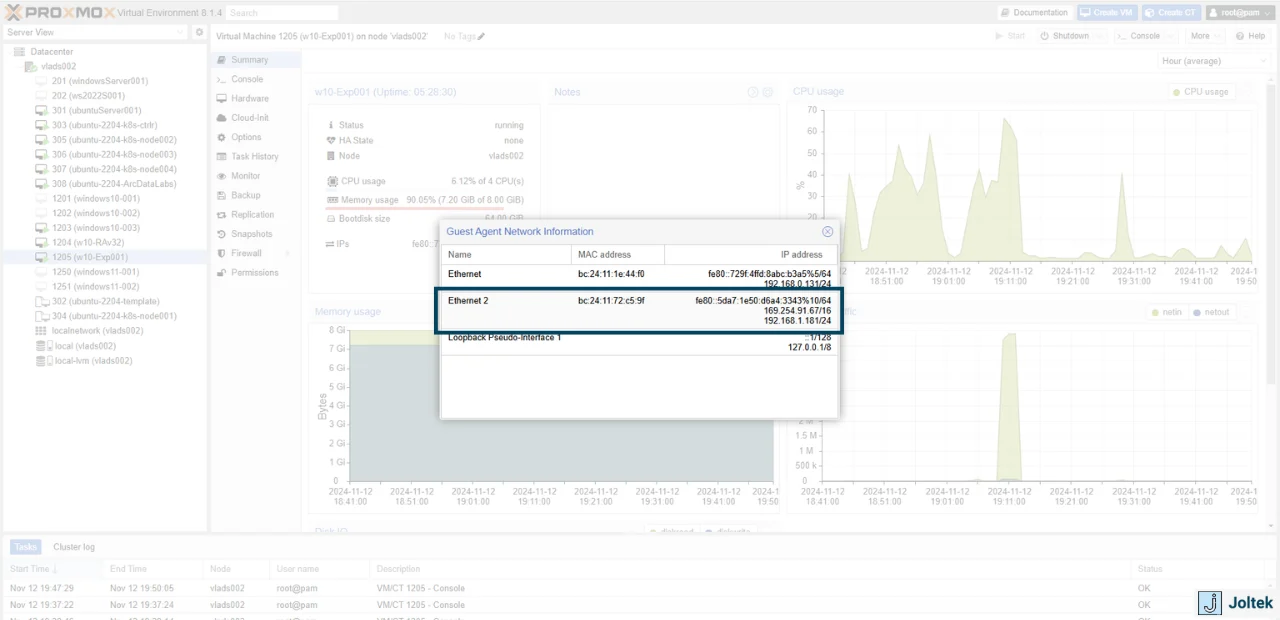
Notice that if you were to go back to the QEMU tab, you’ll see the second Ethernet driver listed. However, the IP address is definitely not what I had in mind. This makes sense as there’s no router that would assign an IP address to this “new device.” We’ll have to take care of that manually.
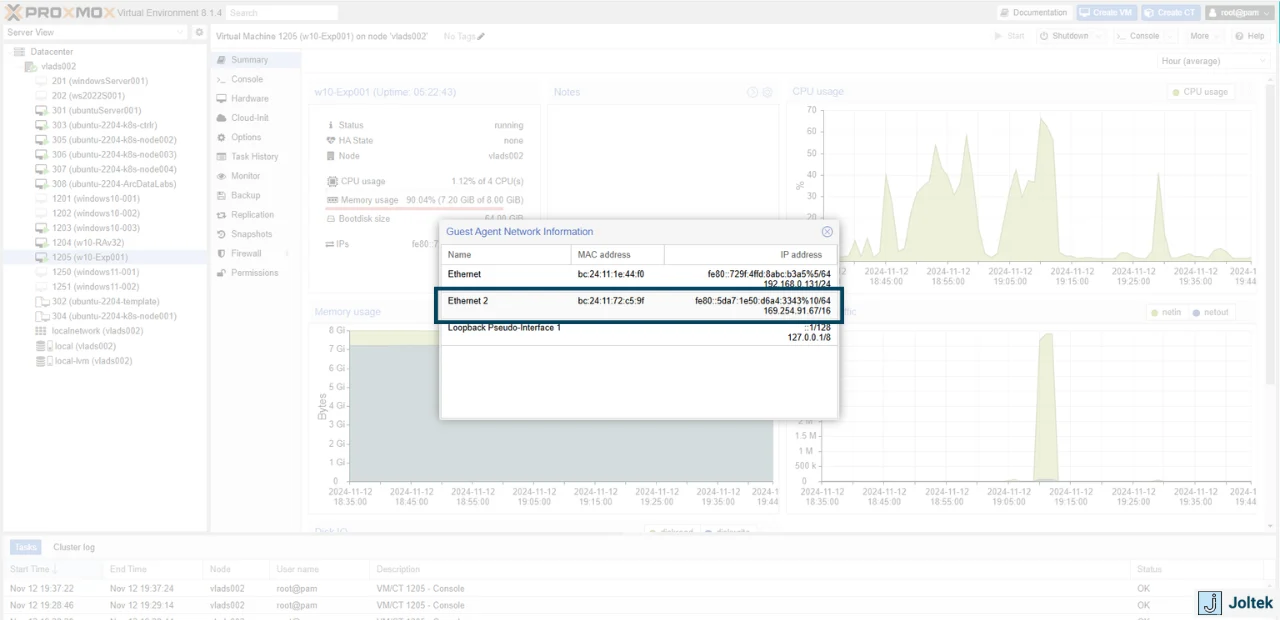
To do so, we can navigate to the VM and change the configuration of the second adapter in the Control Panel. I’m giving mine a 192.168.1.181 address based on my network map.
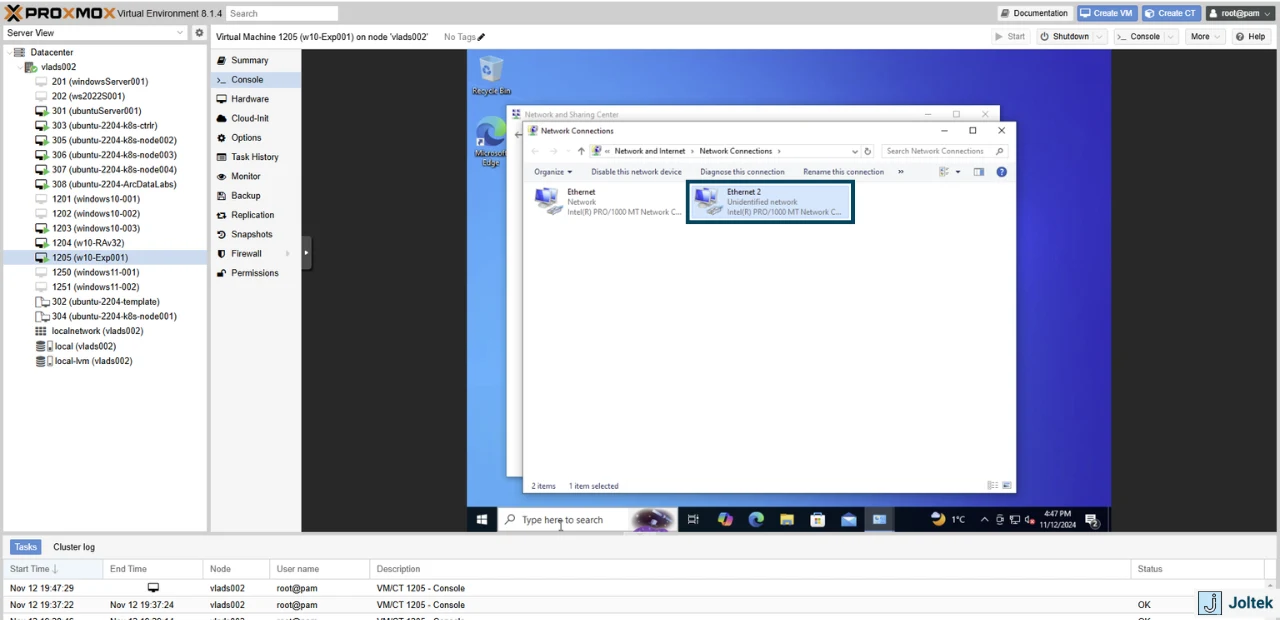
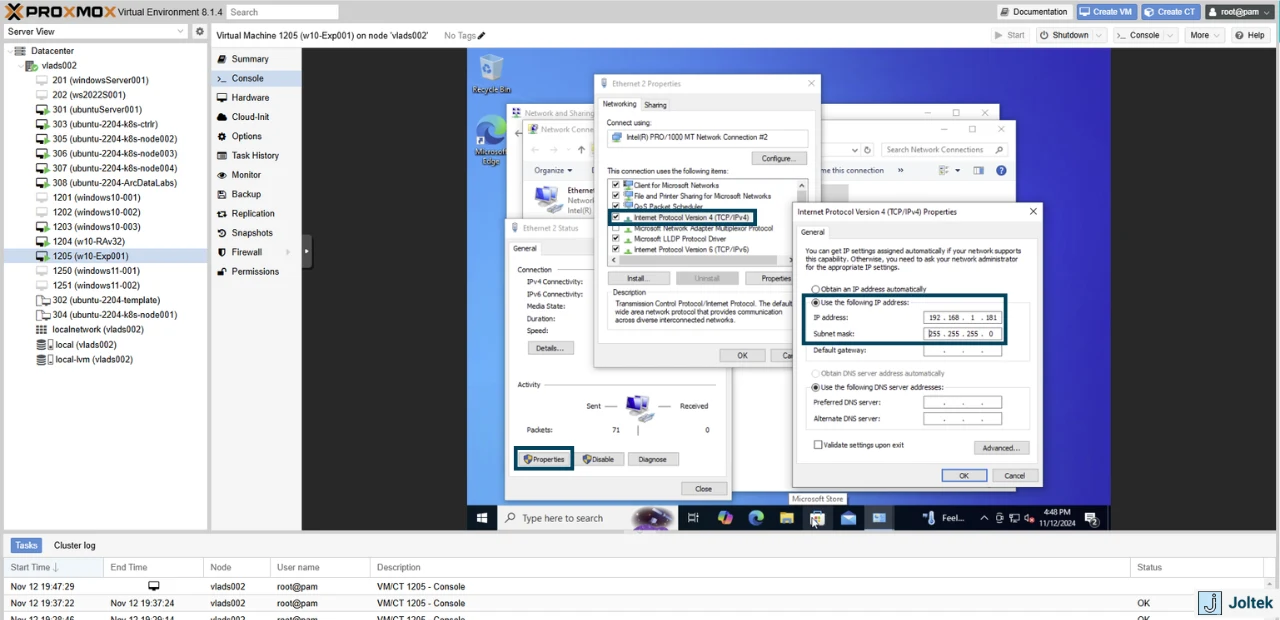
Note that the IP address will immediately update within the Proxmox interface. As shown below, we now have a static IP address within the private network that is used for industrial automation devices.
Proxmox - Remote Access VMs
I’ve mentioned this earlier, but I dislike programming these VMs via the small console you get on Proxmox. I much prefer using Remote Desktop which lands the VM on one of my monitors, at which point it feels like I have full control of the machine. For this, we’ll need to enable remote desktop, which is only available on Windows Pro.
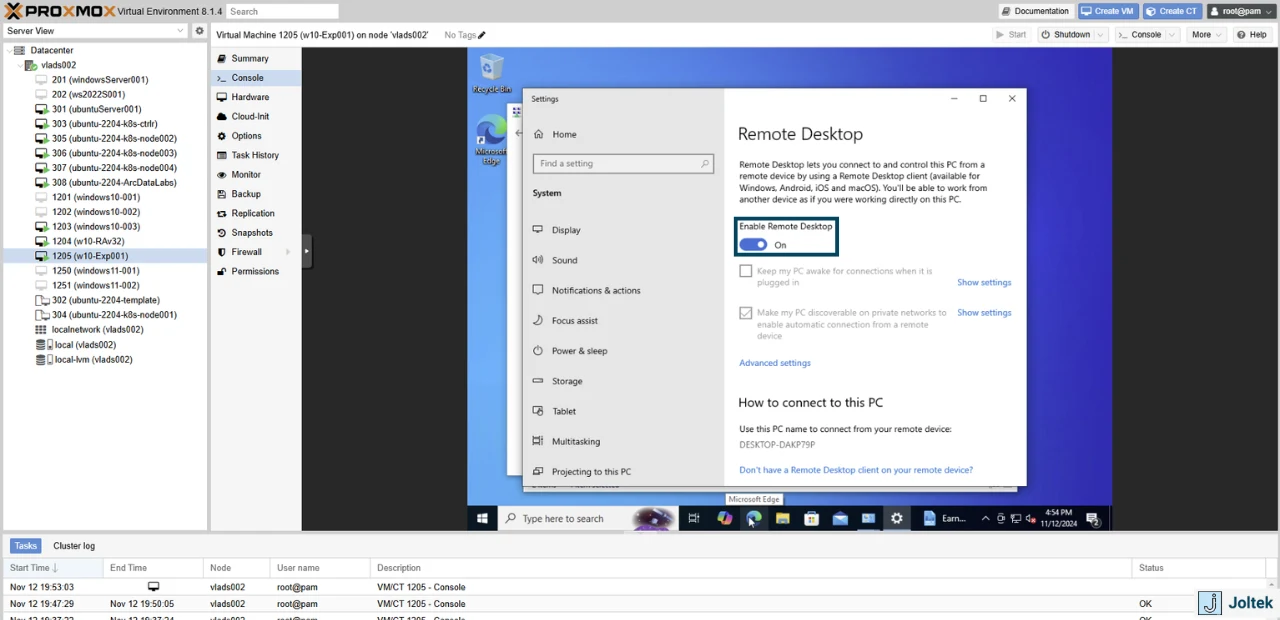
To do so, we’ll need to open the console one last time and search for remote desktop settings where we toggle the “Enable Remote Desktop” to ON.
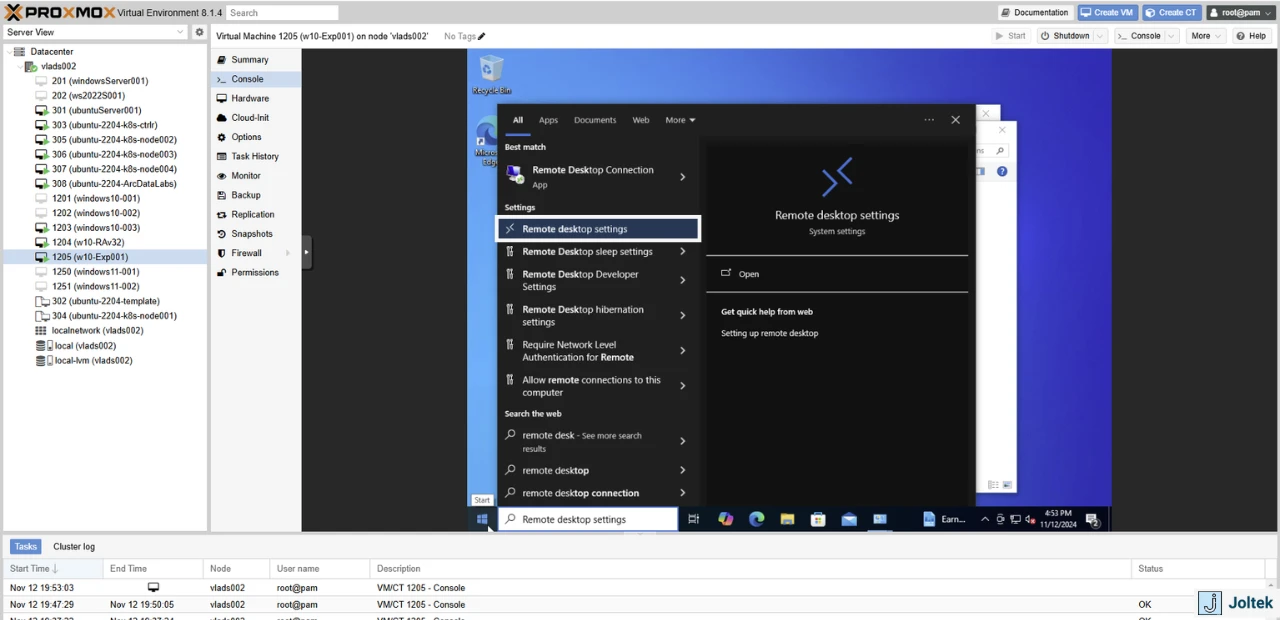
To access this machine, I can run “Remote Desktop Connection” on my machine and I can enter the IP address of either side (In other words, if my laptop is on the private network, I’ll use the 192.168.0.xxx address while on the public one I’ll use 192.168.1.xxx IP).
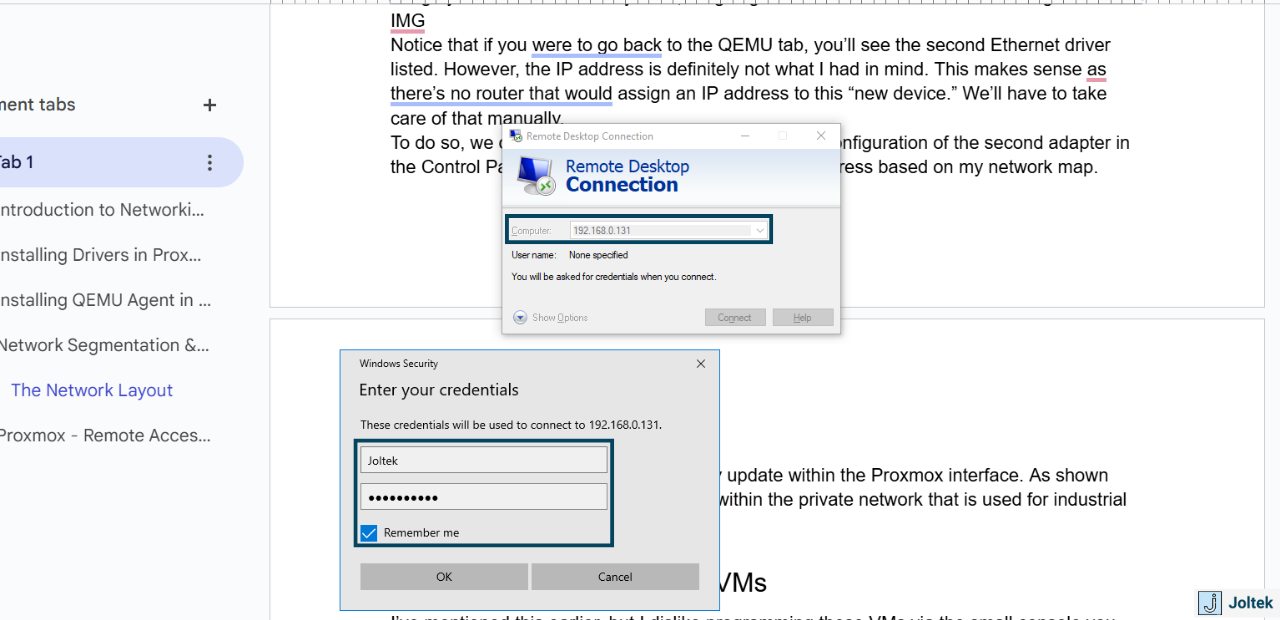
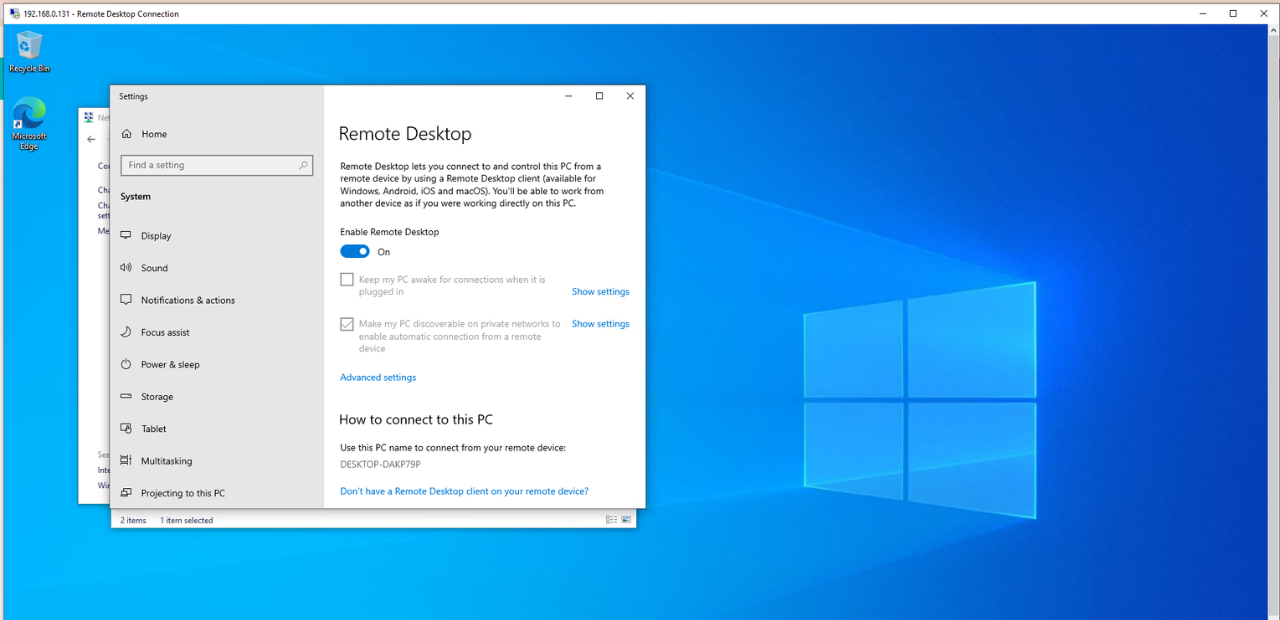
I’ve entered the credentials we created for this PC and we’re in!
Conclusion on Running Windows VMs on Proxmox
At this point, we’ve configured a variety of settings on the VM we deployed in our last tutorial. My goal was to be able to add it to both of my networks as needed and to remote into the VM from my local machine. Note that it’s possible to remote into it via a VPN; one interesting tool that was recommended to me for this purpose (I’ve already tested it, and it works) is called Tailscale. Easy to install on the VM, the tunnel shows up on Proxmox, and you can give yourself or your friends remote access.
Perhaps we’ll get into that configuration in a separate tutorial. For now, I'll focus on getting some Unified Namespace , MQTT, and MES software onto this VM.


